Payment Gateway: Difference between revisions
m (1 revision imported) |
No edit summary |
||
| (50 intermediate revisions by the same user not shown) | |||
| Line 1: | Line 1: | ||
{{Module Introduction|Payment Gateway|Integrations}} allows Fishbowl to process credit cards | {{Module Introduction|Payment Gateway|Integrations}} allows Fishbowl to process credit cards using the [[#Fishbowl Payments|Fishbowl Payments]] gateway. The [[Legacy Gateways|legacy gateways]] are hidden by default. For more information about Intuit Payments, Square, Clover Connect, or {{Authorize.Net}}, see [[Legacy Gateways]]. | ||
= | =Fishbowl Payments= | ||
{{:Fishbowl Payments}} | |||
Latest revision as of 15:42, 26 February 2025
 The Payment Gateway module, located in the
 Integrations group, allows Fishbowl to process credit cards using the Fishbowl Payments gateway. The legacy gateways are hidden by default. For more information about Intuit Payments, Square, Clover Connect, or Authorize.Net, see Legacy Gateways.
Fishbowl Payments
Fishbowl Payments allows credit cards and ACH payments to be processed from within Fishbowl Advanced. Additionally, payment links can be included in emails and invoices.
Getting started
- Expand the Integrations module group and then open the
 Payment Gateway module.

- If you don't have a Fishbowl Payments account, click the blue button to get started. If you already have a Fishbowl Payments account, click Enter credentials here and skip to the Approved section below.

- Make any needed changes to the pre-populated fields and then click Sign Up.

- Click Reset your password near the bottom of the browser window that opens.

- Type your email address that was entered previously and then click the Send Email button.
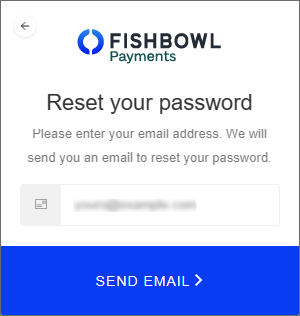
- You will then receive an email that allows you to create a new password and begin your application.
- The current status of your application will be displayed on the Gateway tab where you can click the link to provide any requested information.

- When the Underwriting Status is Approved and the Account Status is Active, you're ready to continue.


Approved
- After your account is approved, payments will be processed using the Fishbowl Payments gateway.
- If Use Card on File is enabled on the Settings tab, cards can be securely remembered by selecting Store Card on File after entering the card details.

- Stored cards can then be viewed on the Card on File tab of the
 Customer module and can be selected as the Method when processing payments.

- You can also generate payment links to send to your customers, or to include on invoices and reports.


Payment links
- To enable payment links, open the Payment Gateway module, click the Settings tab, and then verify that Enable Payment Links is enabled.
- To generate a payment link, open an issued sales order and click the
 Payment Link button button at the top of the module. A Pay Online button will then be added to the bottom of the Sales Order Report.

- The text of the Pay Online button can be customized on the Field Titles tab of the Sales Order Report.
- There is a setting on the Optional tab of the Sales Order Report to hide or show the Pay Online button.
- The payment link can also be copied and manually sent to customers.


Overview video
Setup video
Payment Link video
TABS
The Payment Gateway module has a Dashboard tab, a Settings tab, and a Gateway tab.
Dashboard
The Dashboard tab displays your Fishbowl Payments portal. The Dashboard module displayed in this tab is for informational purposes only. You can navigate to other Fishbowl Payments modules with the menu on the left.
The blue button on the top-right is inactive. All transactions will be done within Fishbowl itself. In addition, you can view your Reports and Invoices, and see your Customers, Payments, and any Disputes.
The Settings module gives you the option to personalize the following Fishbowl Payments settings in these tabs.

- Team Settings - Add team members for accessibility.
- Branding - Add your company’s branding image to look like the invoice is coming directly from you.
- Invoice - Send payment receipts, display invoice information, and invoice partial payments. Allow payment methods.
- Customer Settings - Customer custom fields.
- Notifications - Weekly summaries and automated receipt options.
- Sales Tax - Configure custom tax rates.
Settings
The Settings tab displays the following options.
- Use Card on File - Allows cards to be securely stored for reuse (PCI compliant).
- Show CVC - Enables a user to enter a CVC number when taking payments.
- Enable Payment Links - Allows users to generate a payment link for sales orders.
- Allowed Payment Methods - Users can select which payment methods are available when a customer utilizes the payment link.
- Allow Partial Payments - Allows customers to make partial payments using the payment link. If this option is disabled, the customer will need to pay in full.
- Allow Tips - Allows customers to add a tip when using the payment link.
- Time of Day - Allows the user to decide what time of day to import online payments into Fishbowl. Users can also manually run the scheduled task in the
 Schedule module at any time. After making changes to the scheduled task, a restart of the Fishbowl Server is recommended to ensure that the task gets scheduled correctly.
- Payment Method for Imported Payments - Allows users to determine how imported payments will be categorized in Fishbowl.
Gateway
The Gateway tab displays the status of your application and your account.
After you apply your credentials and connect, the Gateway tab will indicate that Fishbowl Payments is now Active. This is what that will look like.

FAQs
Below are some answers to frequently asked questions about Fishbowl Payments.
How much does it cost to purchase Fishbowl Payments?
- We're pleased to be able to offer the Fishbowl Payments product for free to all users of Fishbowl 2023.2 or higher. Like all payment gateways, credit card and ACH processing fees still apply.
Who is Fishbowl Payments for?
- Fishbowl Payments is for new and existing users that are looking for a flexible and secure way to process payments. PLEASE NOTE: Cannabis and some Firearms businesses will not be able to use Fishbowl Payments.
What benefits does Fishbowl Payments offer?
- We've designed Fishbowl Payments with the goal of making payment processing easier for Fishbowl users.
- Confidence in every step of the process: From the moment you hit Sign up you'll be notified where you stand in the process so you can start collecting payments as soon as possible.
- More accuracy, better decisions: With better visibility into your Accounts Receivable and outstanding amounts for customers, you can make better decisions for your business.
- More convenient payments for your most loyal customers: Eliminate manual processes, cut down on human error, and save valuable time by storing customers' credit cards on file so you can quickly and easily charge payments to your customers.
- Send payment links to customers: With Fishbowl Payments, you have the ability to send payment links to your customers right from Fishbowl. You can copy and paste the payment link into an email message or simply email your customer a copy of the Sales Order Report from Fishbowl.
- Manage payments easily and get paid faster: Add a Pay Online link to customer invoices with the click of a button, making collecting payments even easier for you and more convenient for your customers. Offer a more convenient payment experience for your customers so you get paid on faster.
- Send scheduled payment reminders: With Fishbowl Payments, you can send scheduled payment reminders so you are top of mind for customers. Online payments are automatically imported into Fishbowl everyday.
How do I schedule payment reminders?
- To configure payment reminders, click the Dashboard tab, select Settings, and then click Invoice Settings.
Is Fishbowl Payments PCI compliant?
- Yes. Credit card numbers are not saved in the Fishbowl database. If Card on file is used, a secure wallet token is accessed in accordance with industry standards. This increases security because your employees don't have to request and type the same credit card number multiple times.
How does the signup process work?
- When you sign up for Fishbowl Payments, some basic information will be pre-populated from your Fishbowl database. Just click Sign up to be redirected to a login page, set your password, and fill out your application.
How long does it typically take to be approved?
- The underwriting process generally takes 24 hours or less. You can view your account and underwriting status inside on the Gateway tab of the Payment Gateway module.
Can I issue refunds from Fishbowl Payments?
- Yes. Payments can be refunded in the sales order payment window or in the
 Payment Viewer module.
Can I issue a refund using the Card on file payment method?
- Refunds can be issued in the Payment Viewer module or by selecting Refund Credit Card when taking payment on the credit return sales order.
Can I issue a refund to a different credit card than what was used on the original Fishbowl sales order?
- No. To issue a refund on a particular Fishbowl sales order, you must refund the credit card that was used on the original transaction.
Can I have multiple cards on file for a single customer?
- Yes.
Will I be able to process ACH payments with Fishbowl Payments?
- Yes. When taking a payment, select ACH as the Method.
Where do I process ACH refunds with Fishbowl Payments?
- Currently, ACH refunds need to be processed in the Payment Viewer module. The ability to do ACH refunds in the
 Sales Order module is coming soon.
Can I adjust how often payments are imported?
- Right now, Fishbowl will sync payments daily intervals at the time you specify. Users can also manually run the scheduled task in the Schedule module at any time.
Can my customers send down payments?
- You can allow partial payments as a global setting. We will evaluate a better workflow for future releases.
Is there a time limit to how long a payment link is active?
- There is one unique payment link per sales order and the URL never changes or expires. You can copy and paste the link wherever you want.
How does the payment page get updated automatically? What triggers the update, and how does the update happen?
- When you click Save on the sales order, the payment page will update and reflect the new changes.
What reports have the Payment button?
- The Pay Now button is active on the Sales Order Report. We are waiting to get customer feedback to learn which other reports our customers would like included.
When I modify a sales order, will it modify the total owed on a payment link?
- Yes.
Where are payment links stored in the database for review?
- Payment links are stored in SO.payment link as a URL.
Are there automatic payment links?
- Right now, the Payment Link button needs to be clicked at the top of each sales order, but the ability to auto-generate payments links is on the roadmap.
Do payment links prohibit me from deleting sales orders?
- Not at all. You would want to delete the sales order as well as the payment link on the Dashboard tab of the Payment Gateway module. The ability to automatically delete the payment link when a sales order is deleted is on the roadmap.
Will I be able to set partial payments for some customers and not others?
- The partial payment setting is not currently customer specific. However, you can enable partial payments, generate a link, and then disable them again. Stay tuned, though, because that could change in the future.
How do I get notified that a payment has gone through?
- You can set up automatic email notifications on the Dashboard tab of the Payment Gateway module.
- To configure email notifications, open the Dashboard tab of the Payment Gateway module, select Settings, and then click Notifications.
Is there a Payments Received report that just displays payments made through Fishbowl Payments?
- All payments made through Fishbowl Payments are visible on the Dashboard tab of the Payment Gateway module. If you'd like to categorize these payments in the Fishbowl database, you can select a custom payment method on the Settings tab.
What types of cards can I accept with Fishbowl Payments?
- Below are the card types that are automatically enabled when your account is created:
- Visa
- MasterCard
- American Express
- Discover
- Pin Debit
Edit API Keys
During the setup process, your Fishbowl Payments API keys are automatically copied into the Fishbowl Payments Setup window. In the following steps, we'll show you how to find this information, which could be helpful if you want to change accounts. On the Dashboard tab of the Payment Gateway module, you'll log into the account that you want to use. Then you'll copy three values into a new text document and paste them into the Fishbowl Payments Setup window on the Settings tab of the Payment Gateway module.
- Open the Dashboard tab of the Payment Gateway module and click the Settings menu near the bottom-left corner.

- Copy the Platform ID from the Account tab and paste it on the 1st line of any new text document.
- Click the Apps menu near the bottom-left corner, select API Keys, and then click Launch.
- Copy the Web Payments Token and paste it on the 2nd line of the text document.

- On the same page of the Dashboard tab, click ADMIN to expand the main-key. Press the Copy button and then paste the key on the 3rd line of the text document.

- Open the Settings tab of the Payment Gateway module and click the Edit API Keys button.
- Paste the three values from the text document into the Fishbowl Payments Setup window.

- Paste the Platform ID into the Merchant ID field.
- Paste the Web Payments Token into the Payment Token field.
- Paste the main-key into the API Key field.
- Click the Connect button at the bottom of the window to save your changes.


