Report POS Hourly Breakdown: Difference between revisions
From Fishbowl Advanced
m (Text replacement - ".png|border|800px|link={{filepath" to ".png|right|border|800px|link={{filepath") Tag: Reverted |
m (Text replacement - "{{BackToReports}} " to "") Tag: Manual revert |
||
| (One intermediate revision by the same user not shown) | |||
| Line 1: | Line 1: | ||
[[File:Report-POS Hourly Breakdown.png|right|border|400px|link={{filepath:Report-POS Hourly Breakdown.png}}]] This report generates a list of all Sales made with Fishbowl Checkout and shows how many sales were made per hour in a given date range. Shows a graph of the average amount of sales per hour. | |||
The {{Button|Modify Report}} allows the following report filters to be customized:<br> | The {{Button|Modify Report}} allows the following report filters to be customized:<br> | ||
{{Spacer}}'''OPTIONAL TAB''' | {{Spacer}}'''OPTIONAL TAB''' | ||
Latest revision as of 21:16, 12 March 2025
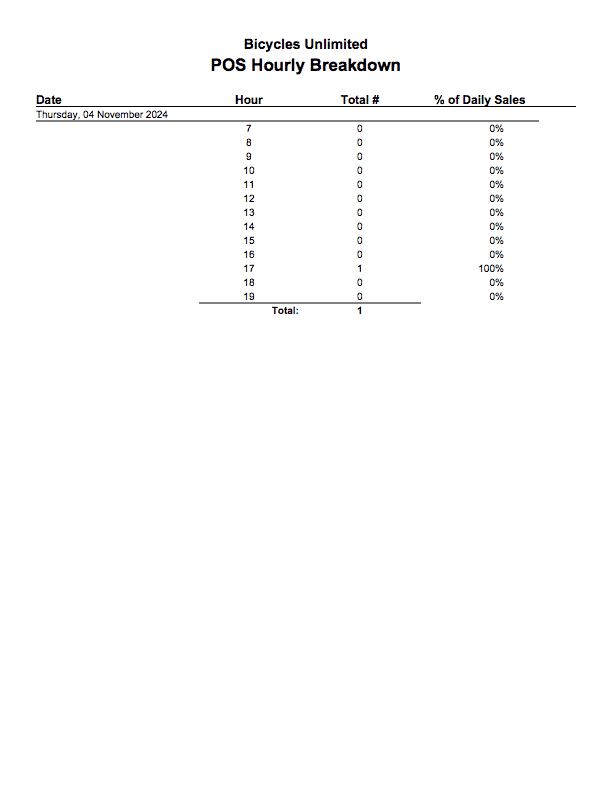
This report generates a list of all Sales made with Fishbowl Checkout and shows how many sales were made per hour in a given date range. Shows a graph of the average amount of sales per hour.
The  Modify Report button allows the following report filters to be customized:
- OPTIONAL TAB
- Date Range - Enter a date range to run the report for. This date range looks at the Date Completed on the SO table of the database, meaning the date and time the order was completely fulfilled.
- Sales Person - Choose which sales person to run the report for. Leave this field blank to run for all sales people.
- Location Group - Choose a specific location group to run the report for. Leave this field blank to run for all location groups.
- Customer - Choose to run the report for a specific customer. Leave this field blank to run for all customers.
- Register Name - Enter a register name to see sales made at that register. Leave this field blank to run for all registers.
- Begin Work Day - Enter the hour that begins the work day. Time formatting is not needed. Use 24 hour clock (military time).
- End Work Day - Enter the hour that ends the work day. Time formatting is not needed. Use 24 hour clock (military time).
- 1 Sunday - Choose to show/hide this day of the week by checking/unchecking this checkbox.
- 2 Monday - Choose to show/hide this day of the week by checking/unchecking this checkbox.
- 3 Tuesday - Choose to show/hide this day of the week by checking/unchecking this checkbox.
- 4 Wednesday - Choose to show/hide this day of the week by checking/unchecking this checkbox.
- 5 Thursday - Choose to show/hide this day of the week by checking/unchecking this checkbox.
- 6 Friday - Choose to show/hide this day of the week by checking/unchecking this checkbox.
- 7 Saturday - Choose to show/hide this day of the week by checking/unchecking this checkbox.
- Format Report for Exporting - Removes the page breaks and displays the report on one long page for exporting to CSV, Excel, and other formats.
- PRINTER TAB - Allows a default printer to be specified for the report in each location group.