Fishbowl Payments
From Fishbowl Advanced
Fishbowl Payments allows credit cards and ACH payments to be processed from within Fishbowl Advanced. Additionally, payment links can be included in emails and invoices.
Getting started
- Expand the Integrations module group and then open the
 Payment Gateway module.

- If you don't have a Fishbowl Payments account, click the blue button to get started. If you already have a Fishbowl Payments account, click Enter credentials here and skip to the Approved section below.

- If needed, modify the pre-populated data in the form and then click Sign Up.

- Click Reset your password near the bottom of the browser window that opens.

- Type your email address that was entered previously and then click the Send Email button.
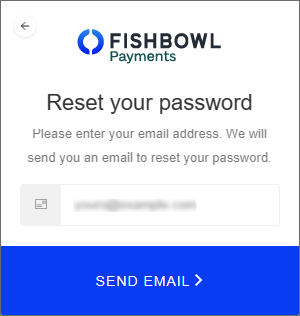
- You will then receive an email that allows you to create a new password and begin your application.
- The current status of your application will be displayed on the Gateway tab where you can click the link to provide any requested information.

- When the Underwriting Status is Approved and the Account Status is Active, you're ready to continue.


Approved
- After your account is approved, credit card and ACH payments will be processed using the Fishbowl Payments gateway.
- If Use Card on File is enabled on the Settings tab, cards can be securely remembered by selecting Store Card on File after entering the card details.

- Stored cards can then be viewed on the Card on File tab of the
 Customer module and can be selected as the Method when processing payments.

- You can also generate payment links to send to your customers, or include on invoices and reports.


Payment links
- To enable payment links, open the Payment Gateway module, click the Settings tab, and then verify that Enable Payment Links is enabled.
- To generate a payment link, open an issued sales order and click the
 Payment Link button at the top of the module. A Pay Online button will then be added to the bottom of the Sales Order Report.

- The text of the Pay Online button can be customized on the Field Titles tab of the Sales Order Report.
- There is a setting on the Optional tab of the Sales Order Report to hide or show the Pay Online button.
- The payment link can also be copied and manually sent to customers.


Settings
The following options are available on the Settings tab of the Payment Gateway module.
- Use Card on File - Allows users to securely store credit cards on file your customers (PCI compliant).
- Show CVC - Enables a user to enter a CVC number when taking payments.
- Enable Payment Links - Allows users to generate a payment link for sales orders.
- Allowed Payment Methods - Users can select which payment methods are available when a customer utilizes the payment link.
- Allow Partial Payments - Allows customers to make partial payments using the payment link. If this option is disabled, the customer will need to pay in full.
- Allow Tips - Allows customers to add a tip when using the payment link.
- Time of Day - Allows the user to decide what time of day to import online payments into Fishbowl. Users can also manually run the scheduled task in the
 Schedule module at any time.
- Payment Method for Imported Payments - Allows users to determine how imported payments will be categorized in Fishbowl.