Integrations: Difference between revisions
From Fishbowl Drive
m (Text replacement - "</onlyinclude>" to "") |
m (Text replacement - "Fishbowl Online" to "Fishbowl Drive") |
||
| Line 1: | Line 1: | ||
The '''Integrations''' module allows Fishbowl | The '''Integrations''' module allows Fishbowl Drive to integrate with many other platforms. Note that some of these integrations are in '''Beta'''. | ||
__TOC__ | __TOC__ | ||
[[File:FBO Integrations 1.png|800px]] | [[File:FBO Integrations 1.png|800px]] | ||
| Line 18: | Line 18: | ||
==ShipStation== | ==ShipStation== | ||
# To connect to ShipStation, click the '''Connect''' button.<br>{{Image|Connect|ShipStation}} | # To connect to ShipStation, click the '''Connect''' button.<br>{{Image|Connect|ShipStation}} | ||
# Log into your [https://ship.shipstation.com/ ShipStation account] and copy the following information into Fishbowl | # Log into your [https://ship.shipstation.com/ ShipStation account] and copy the following information into Fishbowl Drive.<br>{{Image|1|ShipStation}} | ||
# Click the '''Save''' button. | # Click the '''Save''' button. | ||
{{DS}} | {{DS}} | ||
| Line 27: | Line 27: | ||
# You will be redirected to Shopify's website to log into your account. | # You will be redirected to Shopify's website to log into your account. | ||
# Click the '''Install App''' button.<br>[[File:Shopify Install app.png]] | # Click the '''Install App''' button.<br>[[File:Shopify Install app.png]] | ||
# In your Shopify account, click the '''Apps''' button in the side menu and you should see '''Fishbowl | # In your Shopify account, click the '''Apps''' button in the side menu and you should see '''Fishbowl Drive''' listed as an installed app.<br>[[File:Shopify Apps menu.png]]<br>[[File:Shopify FBO installed.png]] | ||
# {{E-Commerce Settings|Shopify}} | # {{E-Commerce Settings|Shopify}} | ||
# Additional explanations for the Shopify settings in Fishbowl | # Additional explanations for the Shopify settings in Fishbowl Drive are available in [https://www.fishbowlhelp.com/files/FBO/Shopify%20Settings.pdf this PDF]. | ||
{{DS}} | {{DS}} | ||
==WooCommerce== | ==WooCommerce== | ||
# To connect to WooCommerce, click the '''Connect''' button.<br>{{Image|Connect|WooCommerce}} | # To connect to WooCommerce, click the '''Connect''' button.<br>{{Image|Connect|WooCommerce}} | ||
# Log into your [https://woocommerce.com/ WooCommerce account] and copy the following information into Fishbowl | # Log into your [https://woocommerce.com/ WooCommerce account] and copy the following information into Fishbowl Drive.<br>{{Image|1|WooCommerce}} | ||
# Click the '''Save''' button. | # Click the '''Save''' button. | ||
# {{E-Commerce Settings|WooCommerce}} | # {{E-Commerce Settings|WooCommerce}} | ||
| Line 42: | Line 42: | ||
# To connect to BigCommerce, click the '''Connect''' button.<br>{{Image|Connect|BigCommerce}} | # To connect to BigCommerce, click the '''Connect''' button.<br>{{Image|Connect|BigCommerce}} | ||
# You will be prompted to log into your BigCommerce account. | # You will be prompted to log into your BigCommerce account. | ||
# Locate Fishbowl | # Locate Fishbowl Drive in the '''Marketplace''' or in '''My apps''' and then click '''Install'''. | ||
# Fishbowl | # Fishbowl Drive will then be displayed inside of a BigCommerce window, or you can just return to fishbowlonline.com | ||
# {{E-Commerce Settings|BigCommerce}} | # {{E-Commerce Settings|BigCommerce}} | ||
{{DS}} | {{DS}} | ||
| Line 49: | Line 49: | ||
==Amazon== | ==Amazon== | ||
# To connect to Amazon, click the '''Connect''' button.<br>{{Image|Connect|Amazon}} | # To connect to Amazon, click the '''Connect''' button.<br>{{Image|Connect|Amazon}} | ||
# Log into your Amazon account and copy the following information into Fishbowl | # Log into your Amazon account and copy the following information into Fishbowl Drive.<br>{{Image|1|Amazon}} | ||
# Click the '''Save''' button. | # Click the '''Save''' button. | ||
# {{E-Commerce Settings|Amazon}} | # {{E-Commerce Settings|Amazon}} | ||
| Line 56: | Line 56: | ||
{{anchor|Magento}} | {{anchor|Magento}} | ||
==Adobe Commerce== | ==Adobe Commerce== | ||
Fishbowl | Fishbowl Drive integrates with Adobe Commerce (previously called Magento). To complete this integration you will need to create a new API integration in Adobe Commerce and then paste the token into Fishbowl Drive. | ||
# In your Adobe Commerce account, click '''System''' > '''Integrations''' and then click '''Add New Integration'''.<br>{{Image|2|Adobe Commerce}} | # In your Adobe Commerce account, click '''System''' > '''Integrations''' and then click '''Add New Integration'''.<br>{{Image|2|Adobe Commerce}} | ||
# In the '''Integration Info''' section, enter a name and your password, and then click the '''API''' section.<br>{{Image|3|Adobe Commerce}} | # In the '''Integration Info''' section, enter a name and your password, and then click the '''API''' section.<br>{{Image|3|Adobe Commerce}} | ||
# For '''Resource Access''', select '''All''', and then click '''Save'''.<br>{{Image|4|Adobe Commerce}} | # For '''Resource Access''', select '''All''', and then click '''Save'''.<br>{{Image|4|Adobe Commerce}} | ||
# Click the blue '''Activate''' link for the new integration, click '''Allow''', and then copy the '''Access Token'''.<br>{{Image|5|Adobe Commerce}} | # Click the blue '''Activate''' link for the new integration, click '''Allow''', and then copy the '''Access Token'''.<br>{{Image|5|Adobe Commerce}} | ||
# In Fishbowl | # In Fishbowl Drive click '''Integrations''' > '''Market''' and then click the Adobe Commerce '''Connect''' button.<br>{{Image|Connect|Adobe Commerce}} | ||
# After entering your Store URL, paste the token from Step 4 into the '''Auth Token''' field and then click '''Save'''.<br>{{Image|1|Adobe Commerce}} | # After entering your Store URL, paste the token from Step 4 into the '''Auth Token''' field and then click '''Save'''.<br>{{Image|1|Adobe Commerce}} | ||
# {{E-Commerce Settings|Adobe Commerce}} | # {{E-Commerce Settings|Adobe Commerce}} | ||
| Line 83: | Line 83: | ||
# To connect to Stripe, click the '''Connect''' button.<br>{{Image|Connect|Stripe}} | # To connect to Stripe, click the '''Connect''' button.<br>{{Image|Connect|Stripe}} | ||
# You will be redirected to Stripe's website to log into your account or to create a new account.<br>[[File:FBO Integrations Stripe 2.png]] | # You will be redirected to Stripe's website to log into your account or to create a new account.<br>[[File:FBO Integrations Stripe 2.png]] | ||
# After completing the required steps on Stripe's website, you will be redirected back to Fishbowl | # After completing the required steps on Stripe's website, you will be redirected back to Fishbowl Drive. You can now generate '''Pay Now''' links that can be displayed on reports and emailed to customers. | ||
{{DS}} | {{DS}} | ||
==Authorize== | ==Authorize== | ||
# To connect to Authorize'''.'''Net, click the '''Connect''' button. | # To connect to Authorize'''.'''Net, click the '''Connect''' button. | ||
# Log into your Authorize'''.'''Net account and copy the following information into Fishbowl | # Log into your Authorize'''.'''Net account and copy the following information into Fishbowl Drive.<br>{{Image|1|Authorize.Net}} | ||
# Click the '''Save''' button. | # Click the '''Save''' button. | ||
{{DS}} | {{DS}} | ||
==TaxJar== | ==TaxJar== | ||
Fishbowl | Fishbowl Drive integrates with TaxJar to simplify sales tax calculations and reporting. TaxJar takes the hassle out of managing the many complex taxing laws and automatically returns a total tax amount based on the taxable order total and the shipping address. Follow the steps below to integrate Fishbowl Drive with TaxJar (requires a TaxJar Pro subscription). | ||
# To connect to TaxJar, log into your Fishbowl | # To connect to TaxJar, log into your Fishbowl Drive account at [https://fishbowlonline.com/integrations/market fishbowlonline.com]. Select '''Integrations''' > '''Market''' > '''Other''' and then click the TaxJar '''Connect''' button.<br>[[File:FBO Integrations TaxJar 0.png]] | ||
# Log into your TaxJar Pro account at [https://app.taxjar.com/ app.taxjar.com], click the '''Account''' dropdown, select '''TaxJar API''', and then copy the '''Live Token'''.<br>[[File:TaxJar account.png]] | # Log into your TaxJar Pro account at [https://app.taxjar.com/ app.taxjar.com], click the '''Account''' dropdown, select '''TaxJar API''', and then copy the '''Live Token'''.<br>[[File:TaxJar account.png]] | ||
# Paste the '''Live token''' into the the '''Authorization Token''' field in Fishbowl | # Paste the '''Live token''' into the the '''Authorization Token''' field in Fishbowl Drive. The '''Sandbox Token''' can also be used during testing to avoid TaxJar fees.<br>[[File:FBO Integrations TaxJar 2.png]] | ||
# The total returned from TaxJar will be stored using a tax rate in Fishbowl | # The total returned from TaxJar will be stored using a tax rate in Fishbowl Drive. We recommend creating a new $0 flat rate tax in the [[Tax_Rates|'''Tax Rate''' module]] and then selecting that in the '''Tax''' field shown above. | ||
# In the '''Setup''' field, select '''Calculations and Reporting''' if you want TaxJar to be notified when a shipment is fulfilled in Fishbowl | # In the '''Setup''' field, select '''Calculations and Reporting''' if you want TaxJar to be notified when a shipment is fulfilled in Fishbowl Drive. If you only want to use TaxJar for tax calculations, select '''Calculation'''. | ||
# To calculate sales tax on a [[Sales_Orders|sales order]], click '''Calculate Taxes''' at the bottom of the order.<br>[[File:FBO Integrations TaxJar 3.png]] | # To calculate sales tax on a [[Sales_Orders|sales order]], click '''Calculate Taxes''' at the bottom of the order.<br>[[File:FBO Integrations TaxJar 3.png]] | ||
:'''TaxJar FAQs''' | :'''TaxJar FAQs''' | ||
:* '''Where do I enter the TaxJar API Token?''' - The TaxJar API Token is pasted into Fishbowl | :* '''Where do I enter the TaxJar API Token?''' - The TaxJar API Token is pasted into Fishbowl Drive during the [[#TaxJar|TaxJar integration]]. | ||
:* '''What event triggers a sales tax calculation request?''' - A sales tax calculation is requested when the clicking '''Calculate Taxes''' at the bottom of a [[Sales_Orders|sales order]]. | :* '''What event triggers a sales tax calculation request?''' - A sales tax calculation is requested when the clicking '''Calculate Taxes''' at the bottom of a [[Sales_Orders|sales order]]. | ||
:* '''What event triggers a refund to be sent to TaxJar?''' - Fishbowl | :* '''What event triggers a refund to be sent to TaxJar?''' - Fishbowl Drive will send a refund request to TaxJar when a shipment is voided in [[Shipping|the '''Shipping''' module of Fishbowl Drive]]. | ||
:* '''Is TaxJar notified when I fulfill a shipment in Fishbowl | :* '''Is TaxJar notified when I fulfill a shipment in Fishbowl Drive?''' - Yes, if '''Calculations and Reporting''' is selected in the '''Setup''' field of the Fishbowl Drive integration window. | ||
:* '''How do I configure Product Tax Codes on products, services, or inventory?''' - Tax codes can be set on the '''Sale Items''' tab of the [[Items|'''Items''' module]]. | :* '''How do I configure Product Tax Codes on products, services, or inventory?''' - Tax codes can be set on the '''Sale Items''' tab of the [[Items|'''Items''' module]]. | ||
:* '''How do I configure customer exemptions?''' - A customer can be marked as '''Tax Exempt''' at the bottom of the '''General''' tab in the [[Customers|'''Customers''' module]]. | :* '''How do I configure customer exemptions?''' - A customer can be marked as '''Tax Exempt''' at the bottom of the '''General''' tab in the [[Customers|'''Customers''' module]]. | ||
:* '''How do I disable sales tax calculations and transaction sync?''' - Sales tax calculations are only requested when you click the '''Calculate Taxes''' button at the bottom of a sales order. If you don't want to send shipment notifications to TaxJar, select '''Calculation''' in the integration window. If you want to completely disable the TaxJar integration, click the '''Disconnect''' button in the '''Integrations''' section of Fishbowl | :* '''How do I disable sales tax calculations and transaction sync?''' - Sales tax calculations are only requested when you click the '''Calculate Taxes''' button at the bottom of a sales order. If you don't want to send shipment notifications to TaxJar, select '''Calculation''' in the integration window. If you want to completely disable the TaxJar integration, click the '''Disconnect''' button in the '''Integrations''' section of Fishbowl Drive. | ||
:* '''Where can I sync or review nexus states?''' - Fishbowl | :* '''Where can I sync or review nexus states?''' - Fishbowl Drive syncs nexus states with every TaxJar request. Nexus states can be reviewed in TaxJar by clicking [https://app.taxjar.com/account#states here] or by clicking '''State nexus settings''' in your TaxJar Account settings. | ||
:* '''Where can I view the API request logging?''' - To view the history of API requests, log into your TaxJar Pro account at [https://app.taxjar.com/ app.taxjar.com], click the '''Account''' dropdown, and then select '''TaxJar API'''. | :* '''Where can I view the API request logging?''' - To view the history of API requests, log into your TaxJar Pro account at [https://app.taxjar.com/ app.taxjar.com], click the '''Account''' dropdown, and then select '''TaxJar API'''. | ||
Revision as of 14:17, 7 December 2022
The Integrations module allows Fishbowl Drive to integrate with many other platforms. Note that some of these integrations are in Beta.

QuickBooks Online
- To connect to QuickBooks Online, click the Connect button and approve the integration with your QuickBooks Online account.
- After completing the integration, the QuickBooks Online module will be added to the Accounting module group.

Shippo
- To connect to Shippo, click the Connect button.
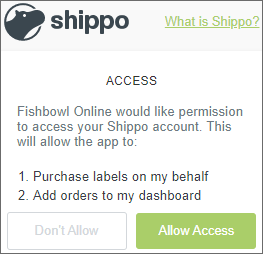
- Login with your Shippo account and click Allow Access
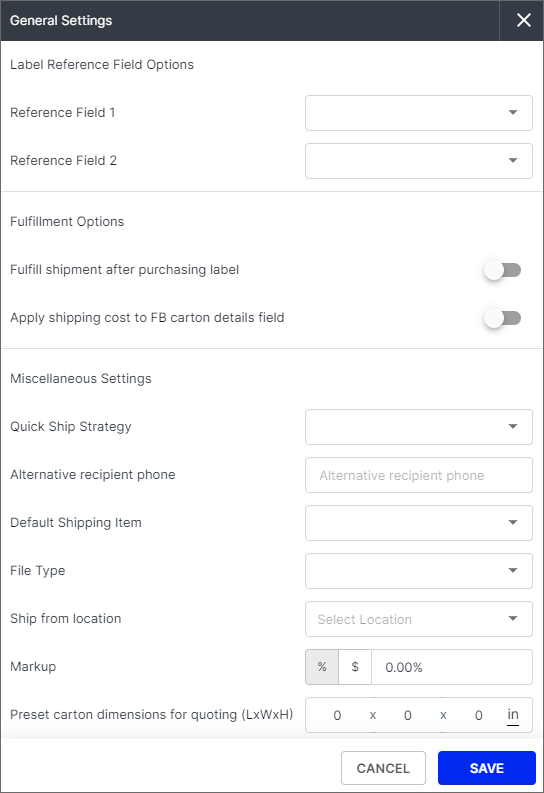
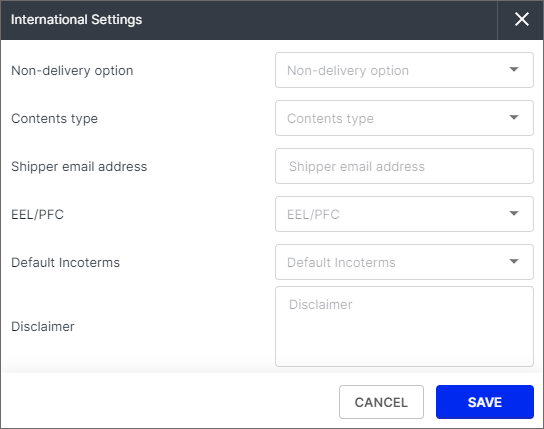
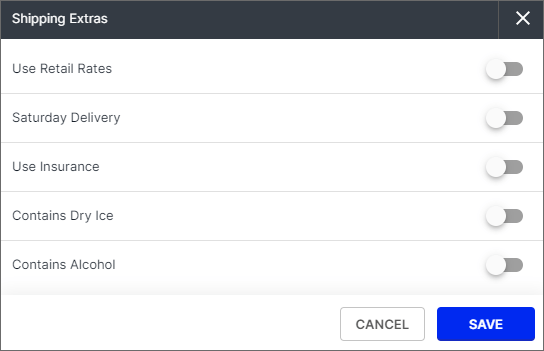
- Proceed through the wizard to configure the Shippo settings and then click Finish.
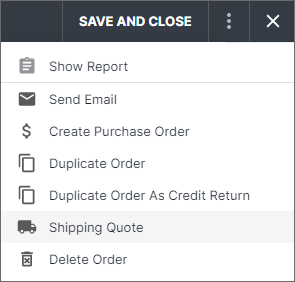
- Sales order will now have the option to generate a shipping quote.
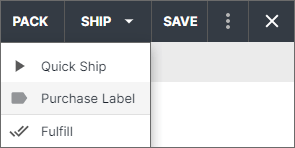
- Shipments will have the option to purchase a label.


ShipStation
- To connect to ShipStation, click the Connect button.
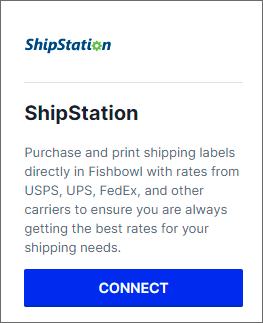
- Log into your ShipStation account and copy the following information into Fishbowl Drive.
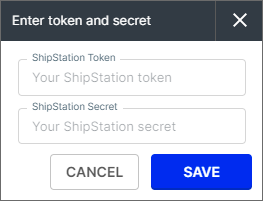
- Click the Save button.


Shopify
- To connect to Shopify click the Connect button.
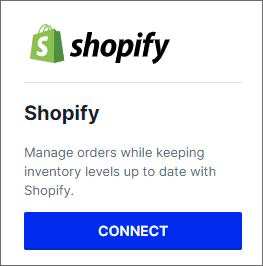
- Enter your Shopify store name to complete the URL and then click the SAVE button.
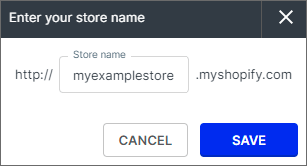
- You will be redirected to Shopify's website to log into your account.
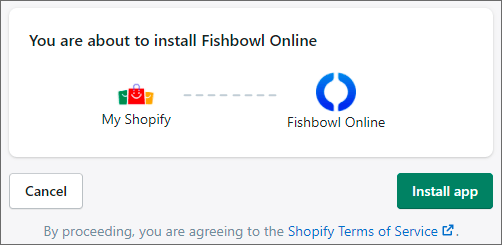
- Click the Install App button.
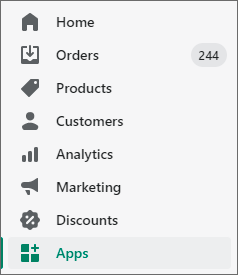
- In your Shopify account, click the Apps button in the side menu and you should see Fishbowl Drive listed as an installed app.
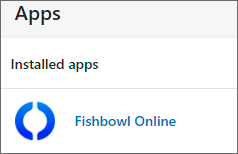
- The settings for the Shopify integration will now be available in Fishbowl Drive by clicking Integrations > E-commerce > Shopify.

- Additional explanations for the Shopify settings in Fishbowl Drive are available in this PDF.


WooCommerce
- To connect to WooCommerce, click the Connect button.
File:FBO WooCommerce Connect.png - Log into your WooCommerce account and copy the following information into Fishbowl Drive.
File:FBO WooCommerce 1.png - Click the Save button.
- The settings for the WooCommerce integration will now be available in Fishbowl Drive by clicking Integrations > E-commerce > WooCommerce.
BigCommerce
- To connect to BigCommerce, click the Connect button.
File:FBO BigCommerce Connect.png - You will be prompted to log into your BigCommerce account.
- Locate Fishbowl Drive in the Marketplace or in My apps and then click Install.
- Fishbowl Drive will then be displayed inside of a BigCommerce window, or you can just return to fishbowlonline.com
- The settings for the BigCommerce integration will now be available in Fishbowl Drive by clicking Integrations > E-commerce > BigCommerce.
Amazon
- To connect to Amazon, click the Connect button.
File:FBO Amazon Connect.png - Log into your Amazon account and copy the following information into Fishbowl Drive.
File:FBO Amazon 1.png - Click the Save button.
- The settings for the Amazon integration will now be available in Fishbowl Drive by clicking Integrations > E-commerce > Amazon.
Adobe Commerce
Fishbowl Drive integrates with Adobe Commerce (previously called Magento). To complete this integration you will need to create a new API integration in Adobe Commerce and then paste the token into Fishbowl Drive.
- In your Adobe Commerce account, click System > Integrations and then click Add New Integration.
File:FBO Adobe Commerce 2.png - In the Integration Info section, enter a name and your password, and then click the API section.
File:FBO Adobe Commerce 3.png - For Resource Access, select All, and then click Save.
File:FBO Adobe Commerce 4.png - Click the blue Activate link for the new integration, click Allow, and then copy the Access Token.
File:FBO Adobe Commerce 5.png - In Fishbowl Drive click Integrations > Market and then click the Adobe Commerce Connect button.
File:FBO Adobe Commerce Connect.png - After entering your Store URL, paste the token from Step 4 into the Auth Token field and then click Save.
File:FBO Adobe Commerce 1.png - The settings for the Adobe Commerce integration will now be available in Fishbowl Drive by clicking Integrations > E-commerce > Adobe Commerce.
Salesforce
- To connect to Salesforce, click the Connect button.
File:FBO Salesforce Connect.png - You will be prompted to log into your Salesforce account and approve the integration.
- Click the Save button.
- The settings for the Salesforce integration will now be available in Fishbowl Drive by clicking Integrations > E-commerce > Salesforce.
eBay
- To connect to eBay, click the Connect button.
- You will be prompted to log into your eBay account and approve the integration.
- Click the Save button.
- The settings for the eBay integration will now be available in Fishbowl Drive by clicking Integrations > E-commerce > eBay.
Stripe
- To connect to Stripe, click the Connect button.
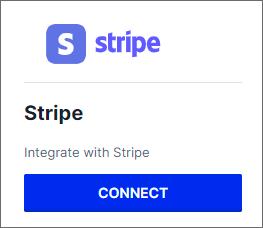
- You will be redirected to Stripe's website to log into your account or to create a new account.
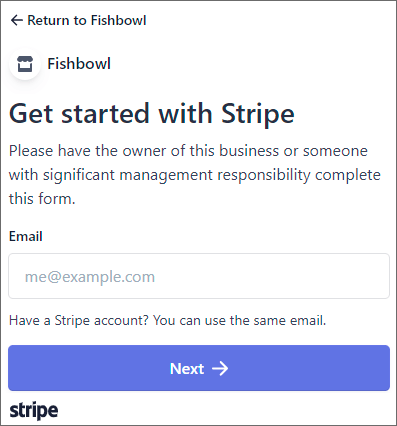
- After completing the required steps on Stripe's website, you will be redirected back to Fishbowl Drive. You can now generate Pay Now links that can be displayed on reports and emailed to customers.


Authorize
- To connect to Authorize.Net, click the Connect button.
- Log into your Authorize.Net account and copy the following information into Fishbowl Drive.
File:FBO Authorize.Net 1.png - Click the Save button.

TaxJar
Fishbowl Drive integrates with TaxJar to simplify sales tax calculations and reporting. TaxJar takes the hassle out of managing the many complex taxing laws and automatically returns a total tax amount based on the taxable order total and the shipping address. Follow the steps below to integrate Fishbowl Drive with TaxJar (requires a TaxJar Pro subscription).
- To connect to TaxJar, log into your Fishbowl Drive account at fishbowlonline.com. Select Integrations > Market > Other and then click the TaxJar Connect button.
File:FBO Integrations TaxJar 0.png - Log into your TaxJar Pro account at app.taxjar.com, click the Account dropdown, select TaxJar API, and then copy the Live Token.
File:TaxJar account.png - Paste the Live token into the the Authorization Token field in Fishbowl Drive. The Sandbox Token can also be used during testing to avoid TaxJar fees.
File:FBO Integrations TaxJar 2.png - The total returned from TaxJar will be stored using a tax rate in Fishbowl Drive. We recommend creating a new $0 flat rate tax in the Tax Rate module and then selecting that in the Tax field shown above.
- In the Setup field, select Calculations and Reporting if you want TaxJar to be notified when a shipment is fulfilled in Fishbowl Drive. If you only want to use TaxJar for tax calculations, select Calculation.
- To calculate sales tax on a sales order, click Calculate Taxes at the bottom of the order.
File:FBO Integrations TaxJar 3.png


- TaxJar FAQs
- Where do I enter the TaxJar API Token? - The TaxJar API Token is pasted into Fishbowl Drive during the TaxJar integration.
- What event triggers a sales tax calculation request? - A sales tax calculation is requested when the clicking Calculate Taxes at the bottom of a sales order.
- What event triggers a refund to be sent to TaxJar? - Fishbowl Drive will send a refund request to TaxJar when a shipment is voided in the Shipping module of Fishbowl Drive.
- Is TaxJar notified when I fulfill a shipment in Fishbowl Drive? - Yes, if Calculations and Reporting is selected in the Setup field of the Fishbowl Drive integration window.
- How do I configure Product Tax Codes on products, services, or inventory? - Tax codes can be set on the Sale Items tab of the Items module.
- How do I configure customer exemptions? - A customer can be marked as Tax Exempt at the bottom of the General tab in the Customers module.
- How do I disable sales tax calculations and transaction sync? - Sales tax calculations are only requested when you click the Calculate Taxes button at the bottom of a sales order. If you don't want to send shipment notifications to TaxJar, select Calculation in the integration window. If you want to completely disable the TaxJar integration, click the Disconnect button in the Integrations section of Fishbowl Drive.
- Where can I sync or review nexus states? - Fishbowl Drive syncs nexus states with every TaxJar request. Nexus states can be reviewed in TaxJar by clicking here or by clicking State nexus settings in your TaxJar Account settings.
- Where can I view the API request logging? - To view the history of API requests, log into your TaxJar Pro account at app.taxjar.com, click the Account dropdown, and then select TaxJar API.