Receiving
![]() The Receiving module, located in the
The Receiving module, located in the ![]() Purchasing group, allows items to be received into inventory. Items can also be reconciled so that the correct data is recorded.
Purchasing group, allows items to be received into inventory. Items can also be reconciled so that the correct data is recorded.
Module buttons
![]() Receive receives the current order.
Receive receives the current order.
![]() Void voids the current order and returns it to an Entered status.
Void voids the current order and returns it to an Entered status.
![]() Reconcile allows items to be added and adjusted during reconciliation.
Reconcile allows items to be added and adjusted during reconciliation.
![]() Fulfill receives and reconciles an order at the same time, changing the order to a Fulfilled status.
Fulfill receives and reconciles an order at the same time, changing the order to a Fulfilled status.
![]() Email opens a window to compose an email. If the module's default report is specified, the PDF report will be attached. Email can be configured on the Email tab of the
Email opens a window to compose an email. If the module's default report is specified, the PDF report will be attached. Email can be configured on the Email tab of the ![]() Settings module.
Settings module.
![]() Print sends the default module report to the printer.
Print sends the default module report to the printer.
![]() How To opens this article in a web browser.
How To opens this article in a web browser.
![]() Refresh reloads whatever is currently open in the module.
Refresh reloads whatever is currently open in the module.
Receive an order
Below are the basic steps required to receive items into Fishbowl.
- Double-click the order number in the search pane to load the order in the
 Receiving module.
 - Select each item and verify or modify the information (such as the quantity, location, and cost) on the Receipt tab below.

- Any changes made in the lower tabs will be saved when the item is received or reconciled.
- Click the
 Receive button to the right to receive the selected item, or click the
  Receive button at the top to receive the entire order.

After an item has been received, an item receipt will be sent to QuickBooks on the next export. Once the order has been reconciled, the item receipt in QuickBooks will be changed to a bill. Orders can also be received using the import.
Receive a partial quantity
Fishbowl allows partial quantities to be received. This may be helpful when only a portion of the original quantity arrives, or if the line item needs to be split so that it can be received into multiple locations, with different tracking, costs, etc. Below are the basic steps required to receive a partial quantity.
- Select the line item that will be split.
- On the Receipt tab, enter the quantity that will be received and then click the Receive button to the right.

- Fishbowl will automatically split the line item to show the portion that has been received, and the portion that still needs to be received.


Put an item on hold
Items can be placed on hold by highlighting the line item and then clicking the ![]() Hold button that is located on the component toolbar to the right. When using the module buttons at the top, items that are on hold will not be modified.
Hold button that is located on the component toolbar to the right. When using the module buttons at the top, items that are on hold will not be modified.

To remove the hold status, highlight the line item and then click the ![]() Hold button again.
Hold button again.
Reject an item
Fishbowl allows items to be rejected. This may be useful if an item arrives damaged and the vendor will be sending a replacement item. Below are the basic steps required to reject an item.
- Select the line item and click the
 Reject button.
 - Enter the quantity that will be rejected and then click OK.

- A new line item with the original quantity will automatically be created so that it can be received when the replacement items arrive.


Enter tracking data
When an item is received that requires tracking information, a window will be displayed where the tracking data can be entered by typing in the tracking fields.

- To automatically enter tracking information (serial numbers, revision levels, lot numbers, expiration dates, etc.) click any of the
 Auto buttons.
 - To enter serial numbers individually, type a serial number into the field and then press the Enter key or click the
 Add button.
 - To enter a range of serial numbers, click the
 Batch Input button. The last set of digits in a serial number will be automatically incremented. For example, A23X48 will become A23X49, A23X50, etc.
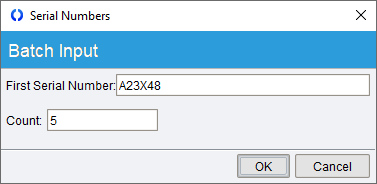
- To import serial numbers from a text file, click the
 Read From File button. The file must be saved in a plain text (.txt) format with one serial number per line.
If a part tracks multiple serial numbers, put each Tracking Name inside quotes on the first line.


Tracking information can also be entered on the Tracking tab prior to receiving an item. If tracking data needs to be modified after the item has been received, the line item can usually be voided. If the item cannot be voided, the tracking information can be edited in the ![]() Inventory module.
Inventory module.
Reconcile an order
In some cases, the invoice received from a vendor will not match the purchase order created in Fishbowl. For example, this could happen if the vendor charges a different amount than expected, sends partial shipments, or adds extra fees that were not on the original purchase order. Reconciling is the process of adjusting the original purchase order to match the invoice. Reconciling can be done before or after receiving the order.
There are two Reconcile buttons. The ![]() Reconcile button on the right immediately reconciles any selected line items. The
Reconcile button on the right immediately reconciles any selected line items. The ![]() Reconcile button at the top of the module displays the Reconcile wizard with the ability to reconcile all items on the order.
Reconcile button at the top of the module displays the Reconcile wizard with the ability to reconcile all items on the order.
- To reconcile one item, highlight the line item, modify the Unit Cost, and then click the
 Reconcile button on the component toolbar to the right. The item will immediately be marked as reconciled. This button can also be used after highlighting multiple line items.
- The Reconcile wizard is displayed when clicking the
 Reconcile button on the module toolbar at the top. This allows multiple items to be reconciled at the same time and also provides the ability to add extra fees and land the cost of those fees to the purchased items. Follow the steps below to reconcile an order using the Reconcile wizard.

- Click the Reconcile button located on the module toolbar at the top of the module.

- Each unreconciled line item will be listed in the wizard, except those on hold. Uncheck the Reconcile checkbox for any items that should not be reconciled.
- If necessary, the cost of each item can be modified by clicking in the Cost or Total fields. If applicable, the costs can also be edited in the alternate currency.
- If applicable, enter a Ref No or Bill Date. If line items have different reference numbers or bill dates, separate bills will be created in QuickBooks.
- The Add Items and Landed Cost steps will be covered in the Landed costs section.
- Click Next to advance to the Summary step. Verify that the data is correct and then click Finish.


Landed costs
Landing costs is the process of including additional fees as part of an item's cost, often by distributing the additional cost over multiple parts that have been received. Below is the basic process for landing costs.
- Receive inventory items on a purchase order. Costs can only be landed across parts that have been received on the order.
- After receiving a purchase order, click the Reconcile button at the top of the module.
- Click Next to advance to the Add Items step. Additional items, such as labor and shipping, can be added by clicking the Add Item button on the component toolbar to the right.

- Click Next to advance to the Landed Cost step and select the items that will accept the additional costs.

- By default, costs will be landed using the method selected on the Reconcile tab of the Receiving module options, but this can be changed on each order.
- After selecting a method, advance to the Summary step to see the calculated landed costs, and then click Finish.


Listed below are formulas and examples for each method of landing costs:
- EXAMPLE - Landing $100 across the following items:
- 10 B201 with each B201 having a billed cost of $4.50, a weight of 1, and a volume of 1.
- 40 B202 with each B202 having a billed cost of $10.00, a weight of 2, and a volume of 2.
- Cost - This will distribute the cost evenly using the total billed cost of the included items.
- Total added cost ÷ Total billed cost of included items * Item billed cost + Item billed cost = Item landed cost
- B201: $100 ÷ $445 * $4.50 + $4.50 = $5.51 each
- B202: $100 ÷ $445 * $10.00 + $10.00 = $12.25 each
- Quantity - This will distribute the cost evenly using the total quantity of the included items.
- Total added cost ÷ Total quantity of included items + Item billed cost = Item landed cost
- B201: $100 ÷ 50 + $4.50 = $6.50 each
- B202: $100 ÷ 50 + $10.00 = $12.00 each
- Size - This will distribute the cost evenly using the total volume of the included items.
- Total added cost ÷ Total volume of included items * Item volume + Item billed cost = Item landed cost
- B201: $100 ÷ 90 * 1 + $4.50 = $5.61 each
- B202: $100 ÷ 90 * 2 + $10.00 = $12.22 each
- Weight - This will distribute the cost evenly using the total weight of the included items.
- Total added cost ÷ Total weight of included items * Item weight + Item billed cost = Item landed cost
- B201: $100 ÷ 90 * 1 + $4.50 = $5.61 each
- B202: $100 ÷ 90 * 2 + $10.00 = $12.22 each
- Manually - The user can manually add costs to items until they equal the total added cost.
Void an item
If a mistake was made when receiving or reconciling an item, the item can usually be voided to correct the mistake.
- To void an item, highlight the line item and then click the
 Void button on the toolbar to the right. Multiple items can also be selected by Ctrl-clicking each item.
 - To void all line items on an order, load the order and then click the
 Void button on the module toolbar.
TABS

The General tab is divided into three sections.
- Order information is displayed at the top along with clickable blue links and order notes.
- The line items to be received are displayed in the center. The line-item buttons to the right are used to modify the selected item.
- Additional details for the selected line item are displayed below on the Receipt, Tracking, Shipping, Open Orders, and Note tabs.

The Receipt tab is located below the receiving line items, and it displays details for the currently selected line item.
- Before an item is received, details such as location and receive date can be modified.
- If necessary, change the number of items to receive before clicking the Receive button.
- The Location field will default to the default location set on the Default Locations tab of the
 Part module.
 - The Deliver to field is a text field that can be used for internal purposes.
- The Unit Cost will default to the value on the purchase order, but it can be modified as necessary.
- The Ref No (reference number) and Bill Date can be set on a per-item basis and will export to QuickBooks. If line items have different reference numbers or bill dates, separate bills will be created in QuickBooks.
- The Customer/Job field will default to the customer if the purchase order was created from a sales order.
If the currently selected line item has part tracking, it will be displayed on the Tracking tab.
- Click the
 Tracking Details button to enter tracking information prior to receiving an item.
 - Tracking data can also be entered when receiving an item.
- After a part with tracking has been received, the tracking data will be displayed on the Tracking tab.

The Shipping tab is located below the receiving line items, and it displays shipping details for the currently selected line item.
- The Track No field can be used to record a tracking number for the shipment.
- The Pkg Count field can be used to keep track of how many packages there are of the selected item.
- The Carrier field defaults to the Vendor's default carrier, or it can be manually changed in the dropdown.
- The Carrier Service field defaults to the Vendor's default carrier service, or it can be manually changed in the dropdown.

The Open Orders tab displays open orders that are creating demand for the selected line item.
- Click the blue link to open any displayed order.

If notes were added to the item on the purchase order or the sales order, they will be displayed on the Note tab.

The Details tab displays details of the open order.
MODULE OPTIONS
Some aspects of the ![]() Receiving module can be customized by opening the module, clicking the Tools menu, and then selecting Module Options.
Receiving module can be customized by opening the module, clicking the Tools menu, and then selecting Module Options.

- Receive to the default Receiving location rather than the part's default location
- With this option on, a part will be received into the location group's default receiving location, instead of the part's default location.
- Update lead times on receive
- This option will update the vendor's lead time when a part is received. A rolling 3 month average is used to calculate the lead time, which is the time from when the Purchase Order is issued until it is received.

- Calculate Landed Cost by:
- This option determines how landed costs are distributed between items. Costs can be landed by Cost, Quantity, Size, Weight, or Manually. Selecting Do not calculate will remove the landed cost step from the Reconcile wizard.
- Update the Vendor Last Cost on Reconcile
- This option will update the vendor's last cost when a purchase order is reconciled.
- Require the bill date for reconcile
- If this option is enabled, a bill date must be entered when an order is reconciled.
- Require reference number for reconcile
- If this option is enabled, a reference number must be entered when an order is reconciled.