Start Fishbowl
This article provides instructions on what to expect when starting Fishbowl for the first time, and how to change from the example database to your own database.
Launching the Fishbowl Server and Client
Fishbowl has two parts that work in tandem: The Fishbowl Server and the Fishbowl Client. The Fishbowl Server must be running before the Fishbowl Client can be used. See Fishbowl fundamentals for more information about the relationship between server and client.
To run the Fishbowl Server and Client, you may do either of the following:
- Choose the Fishbowl Server or Client desktop icons. These icons were an option during the Fishbowl install; therefore, they may not apply for everyone.
- Go to your Start Menu | All Programs | Fishbowl | Fishbowl Server and/or Client.

When the Client Login screen comes up, enter the username and password. If this is the first time running Fishbowl, enter the following:
- Username: admin
- Password: admin

To connect to the Fishbowl Server remotely, you must have the client installed on the remote machine. At the login screen, click the Details button. Replace the word localhost with the IP address of the computer that is running the Fishbowl Server and click Login. Clicking the ![]() Search button next to the Server Address field will search for any Fishbowl Client signals being broadcast from the Fishbowl Server.
Search button next to the Server Address field will search for any Fishbowl Client signals being broadcast from the Fishbowl Server.
If you are unable to connect to the server, you may need to open port 28192 on the server in order for clients to connect to it.
Running Fishbowl for the first time
With a new installation, the server will be running an example database called Bicycles Unlimited. This database is already populated with parts, vendors, customers, etc. and is designed for you to test and explore before creating your own default database.
To log into the example database for the first time, enter the following:
- Username: admin
- Password: admin
A Setup wizard will be displayed. Click Cancel or complete the wizard to change the admin password.

Parts of the screen
- Fishbowl is organized by modules. A module is an area of Fishbowl that is used for a specific business function. Some common modules include Part, Product, Sales Order, Purchase Order, and many more.
- The modules are grouped into nine groups on the left side.
- All open modules are displayed in tabs near the top.
- The active tab is displayed in blue.
- To close a module, hover over the tab and click the X.

The layout of Fishbowl is described below. Hover over any of the sections below to see a brief description. Click any section to learn more.

- Menu bar - Drop down menus, including one for each module group
- Action bar - Notifications, Messages, Bookmarks, Home, and Status
- Module toolbar - Action buttons for the currently active module
- Tabs - All of the currently open modules with the active tab displayed in blue
- Search pane - Search and open items in the module
- Module tabs - Subtabs for the active module with the active tab displayed in blue
- Modules - A list of clickable modules in the current module group
- Component toolbar - Contains additional actions for the item
- Module groups - Click to expand a section and see the modules in that group
1. Menu bar
- The File menu contains useful options, such as Logout, Exit, Print, etc. Imports and Exports are also located in the File menu.
- There is a menu for each Module Group. Any module can be opened by selecting it from the appropriate Module Group menu.
- The Reports menu provides convenient access to reports that are associated with the currently open module.
- The Tools menu contains Module Options, as well as Bookmarks and Program Options.
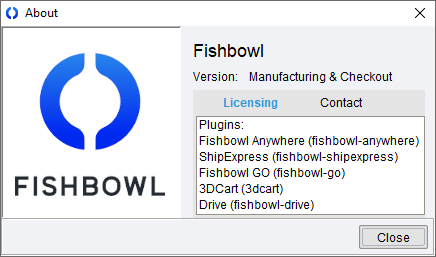
- The Help menu contains access to training materials, as well as information about the installed version of Fishbowl and any plugins.

2. Action bar
- Clicking the
 Notification icon will display any new notifications.
 - Clicking the
 Send a message icon will allow users with the Dashboard-Send a message access right to send a message to another user who is logged into Fishbowl.
- The
 Load Bookmarks icon will load the saved tabs.
 - The
 Load Home icon will load the
  Home module.
 - Clicking the
 Status icon will log out of Fishbowl or bring up the login window. Hovering over the bubble displays the user who is logged in.
- Clicking the

3. Module toolbar
- The module toolbar displays buttons for the currently active module. Each module has several buttons in the module toolbar that perform functions, such as New, Save, Delete, etc. If any plugins are installed, they may add buttons to the module toolbar.
4. Tabs
- Tabs are used to display all of the currently open modules. The active tab is blue. Hover over a tab and click the X to close a module, or right-click a tab for more options.
5. Search pane
- Most modules have a pane that allows searches to be performed. Double-clicking a search result will open the item in the module.
6. Module tabs
- Most modules have various tabs that contain different information regarding the module. The active tab is blue.
7. Modules
- This is a list of the modules in the current module group. Clicking a module name will activate that module.
8. Component toolbar
- Several modules have component toolbars. A component toolbar is a column of small buttons that are used to perform functions, such as Add, Edit, Delete, etc.
9. Module groups
- A module group is a grouping of related modules. Clicking a module group name will expand that section and display the list of modules. The active module group and module will be highlighted in blue.
Changing your default database
Whether you are trying to create a blank database or connect to a different existing database, the following information will provide step-by-step instructions on how to do so.
Creating a new database
To create a new database, you will need to be on the Fishbowl Server computer. The Fishbowl Server will also need to be stopped, which will not allow any existing clients to stay connected.
- Double-click the Fishbowl Server icon in the system tray and then click the Stop button.
- Click the Tools menu and then select Options.

- Click the
 Add Database Connection button on the Database tab of the Fishbowl Server Administration window.
- Enter a new database name and then click Connect. The checkbox to Include Demo Data will populate the new database with example data and allow a country and industry to be selected.

- For empty databases, choose the country and costing method (Average, Standard, FIFO, LIFO). Once this costing method has been chosen, it cannot be changed. For an explanation of each type of costing method, see Costing methods.

- The new database should now appear in the database list of the Fishbowl Server Administration window.
- Click OK and then right-click the Fishbowl Server icon and choose Start.


Connect to an existing database
Follow the instructions below to connect to an existing database.
- Double-click the Fishbowl Server icon in the system tray and then click the Stop button.
- Click the Tools menu and then select Options.
- Click the Add Database Connection button on the Database tab of the Fishbowl Server Administration window.
- Enter an existing database name and then click Connect.

- Click OK and then right-click the Fishbowl Server icon and choose Start.

Switch between databases
Follow the instructions below to switch between databases.
- Double-click the Fishbowl Server icon in the system tray and then click the Stop button.
- Click the Tools menu and then select Options.
- Click the desired database and then click OK.
- Databases can be removed from the list by clicking the
 Disconnect button. To delete the database, right-click the database and select Drop database.
- Databases can be removed from the list by clicking the
- Right-click the Fishbowl Server icon in the system tray and select Start.
Startup wizard
If you are connecting to a new database, Fishbowl provides the Startup wizard to help your company enter some basic information. Below is a description of the steps in the Startup wizard.
- Company Step
- This step allows the user to enter the company name and address. This information will be used throughout Fishbowl. If necessary, this information may be modified at a later date through the
 Company module. This module also allows you to associate additional contacts and addresses with your company.
- Admin Password Step
- This step requests you to change your admin password. If necessary, this password may be changed later. If you have forgotten your admin password and need to have it reset, please contact Fishbowl Support.
- Next Steps
- In this step, a few remaining steps are listed, as well as a link to the Implementation Guide.
Change license key after Fishbowl is installed
When you first installed Fishbowl, you may have selected a Trial license key. Follow the steps below to enter your permanent license key.
- Right-click the Fishbowl Server icon in the system tray and choose Options.

- Click the License tab to enter the Name and License Key.

- Click OK and the license key will be automatically activated.
- Click OK to close the Fishbowl Server Administration window.
- Click the File menu and then select Exit to close down the Fishbowl Server.
- Start the Fishbowl Server again using the desktop icon or by selecting Fishbowl Server from the list of installed programs.

